Page cover

Manage Tokens in the Plugin

The Tokens Page is where most of the magic happens within the Tokens Studio Plugin for Figma.

There are four main sections on the Tokens Page:


1. Plugin controls for the Tokens Page

The actions at the top of the Tokens Page control how the Plugin displays the Tokens Sets and Design Tokens below.

A. Token Set Visibility

B. Token Name Search

C. Theme Selector

D. Token View Toggle

A. Token Set visibility

This action will toggle the left sidebar section below it to hide or show the Token Sets within it.

It's super handy for when you need more space to work with your Design Tokens!

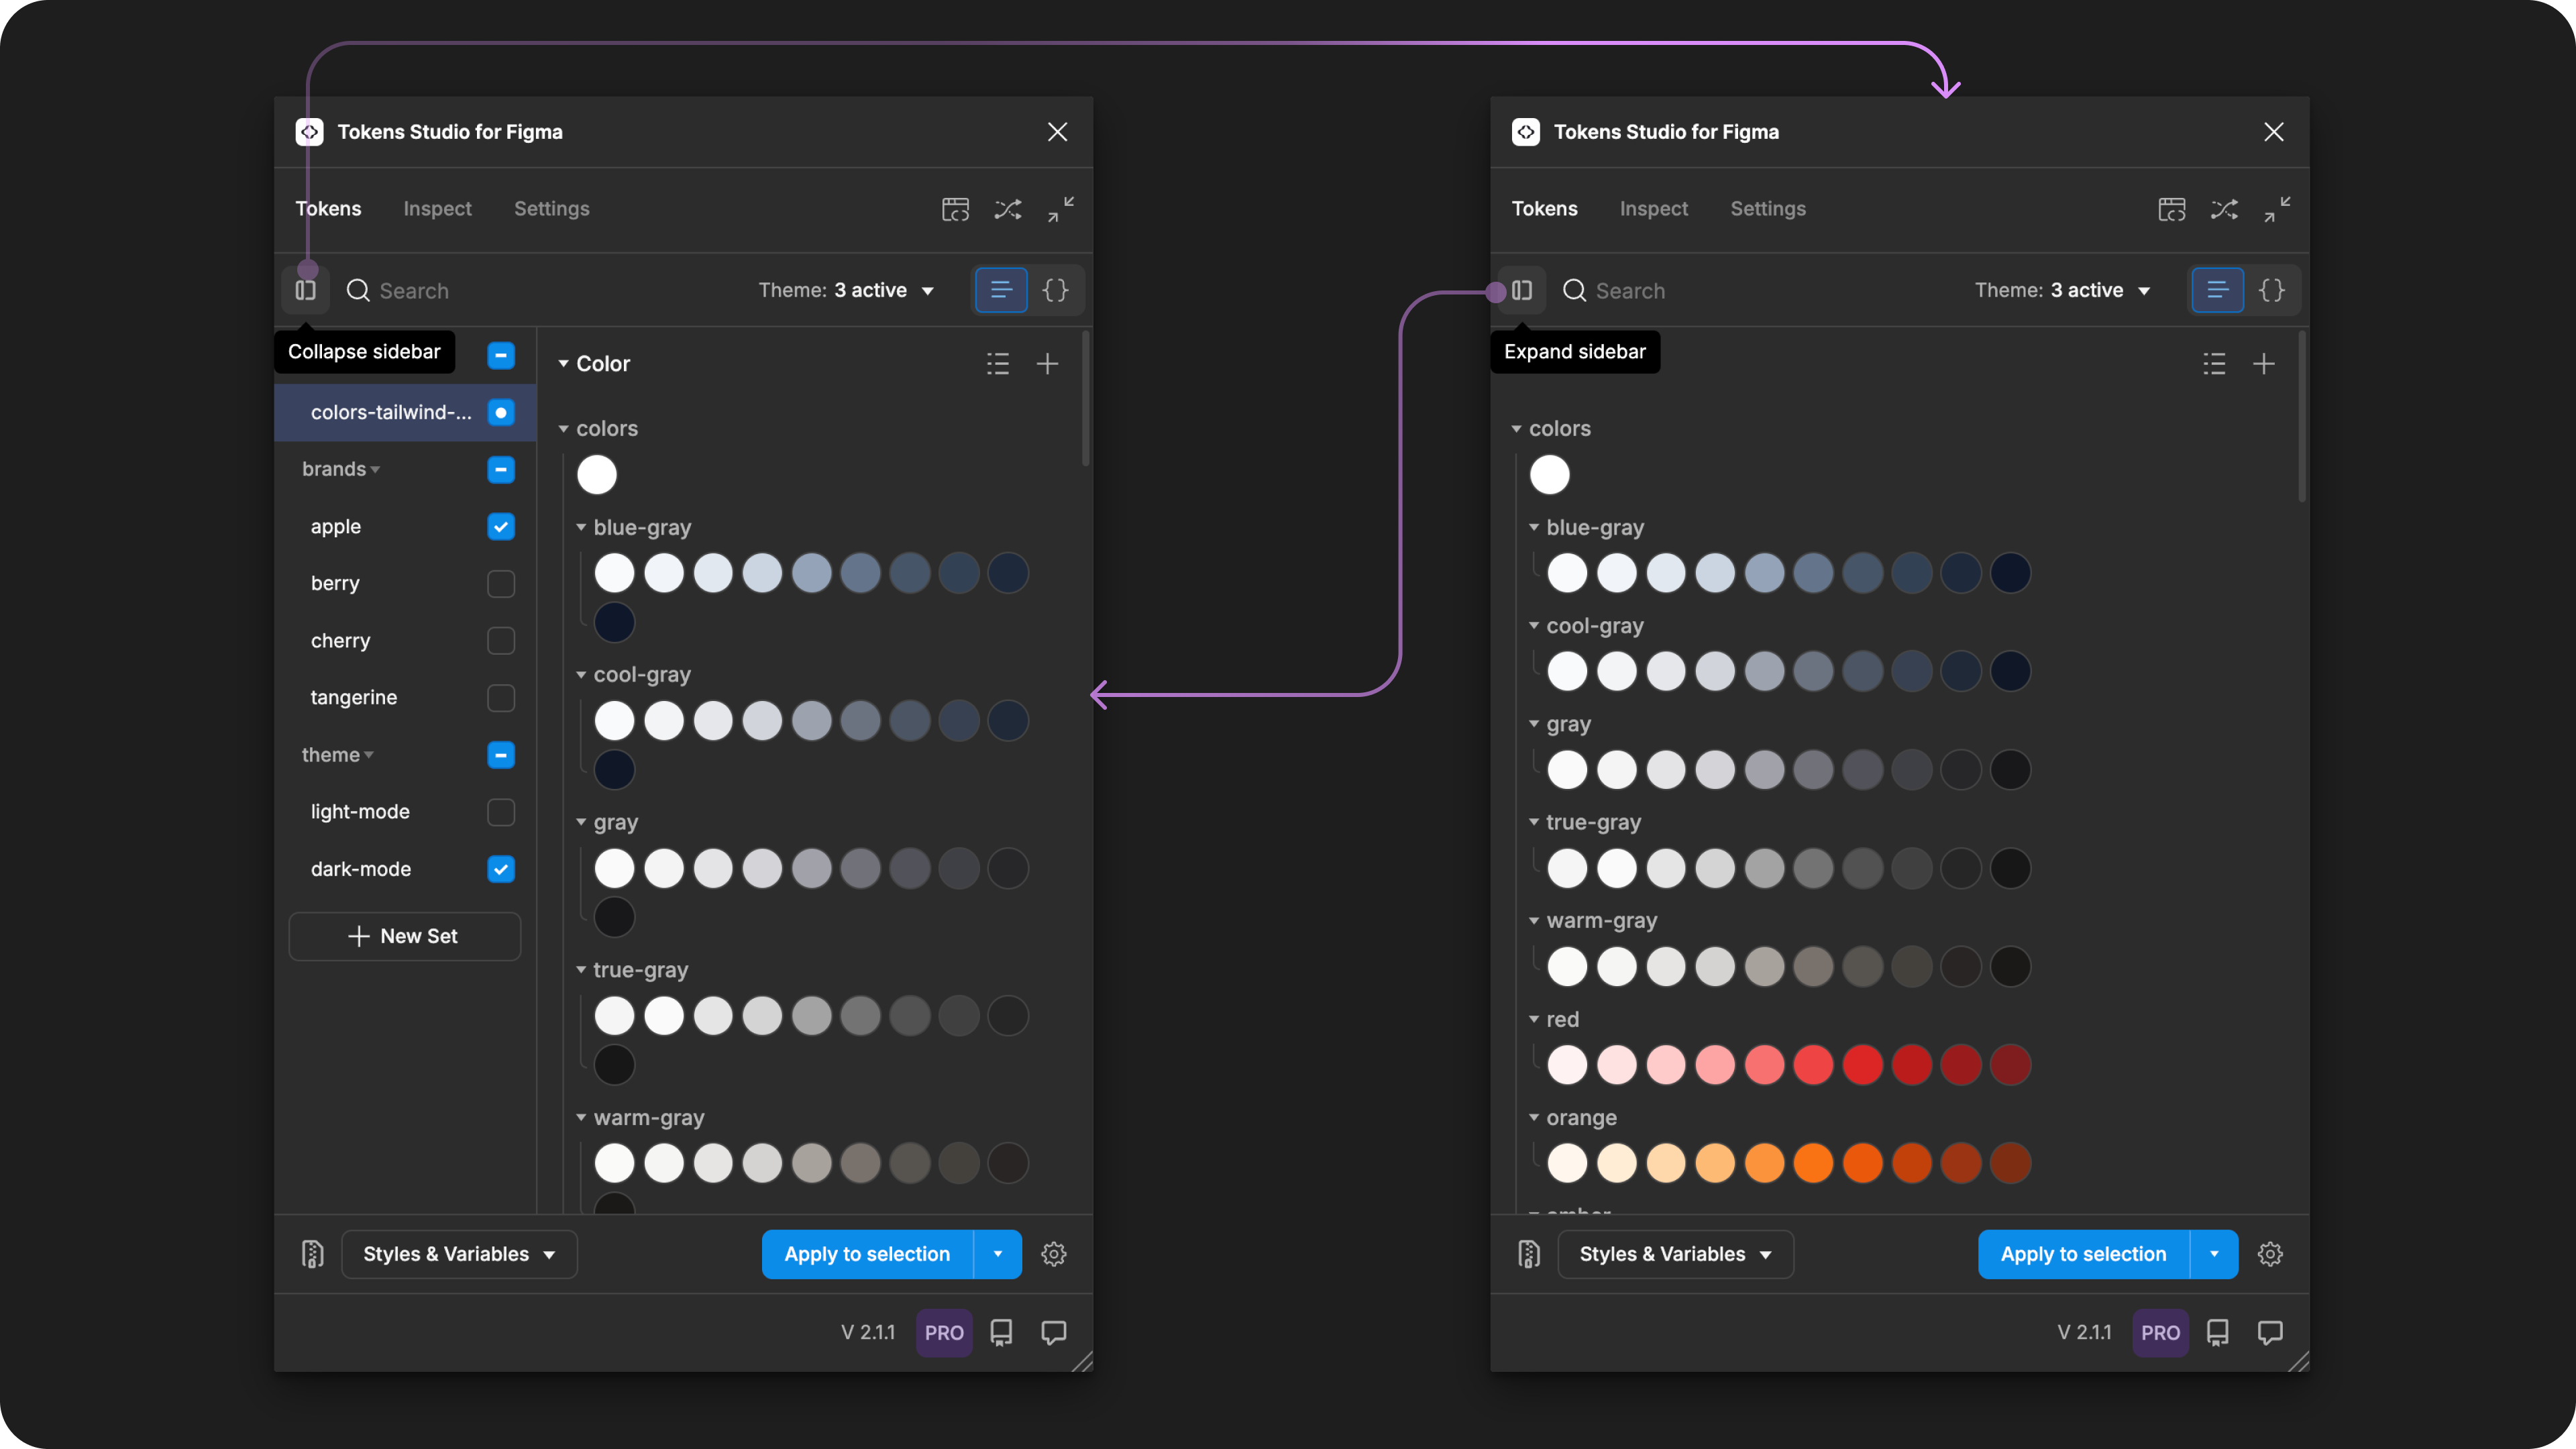
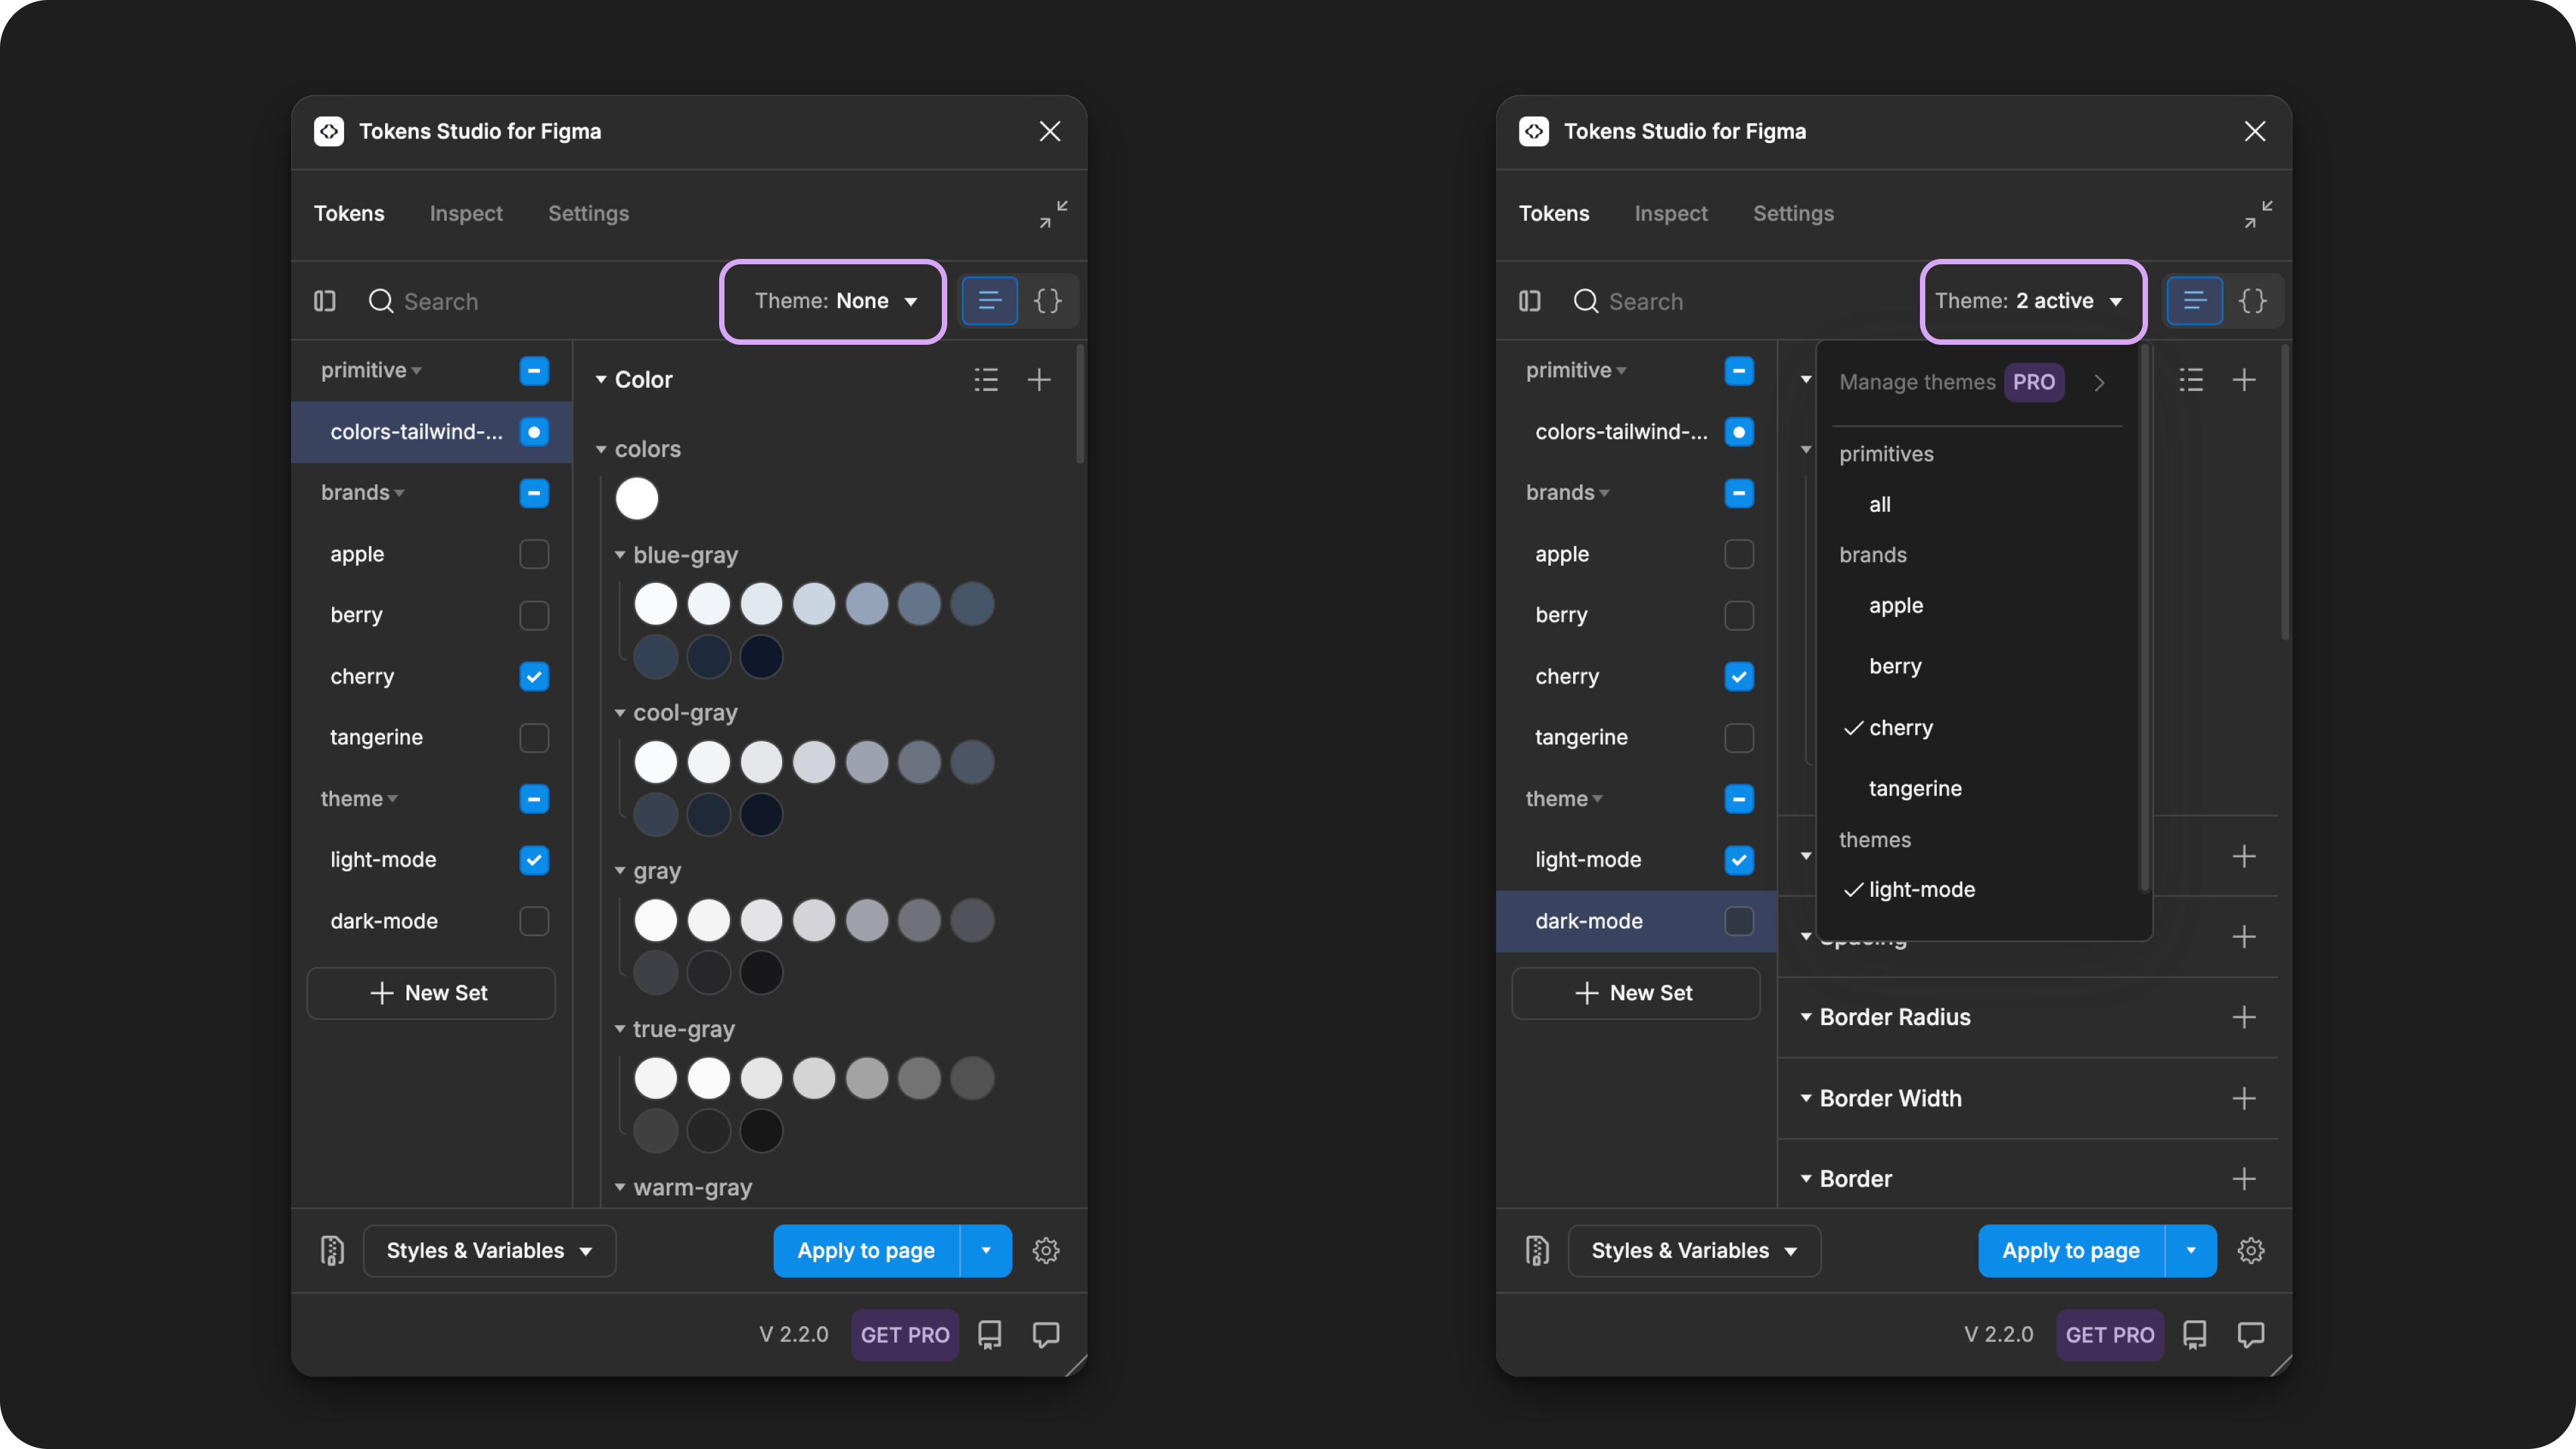
A side-by-side view of the Tokens Page with the left sidebar of Token Sets collapsed on the right side and expanded on the left side. The control to toggle this view is highlighted.

B. Search for a Design Token by name

When you type in the search input, the plugin looks for Design Tokens with Names that match:

  • The Token Set list on the left is filtered to show you where the search result has found a match.

  • A count of tokens found appears to the right of the Token Set name.

  • Selecting a Token Set will show a filtered set of Tokens with Names match the search

You can backspace to clear the search, or use the X icon on the right side of the input.

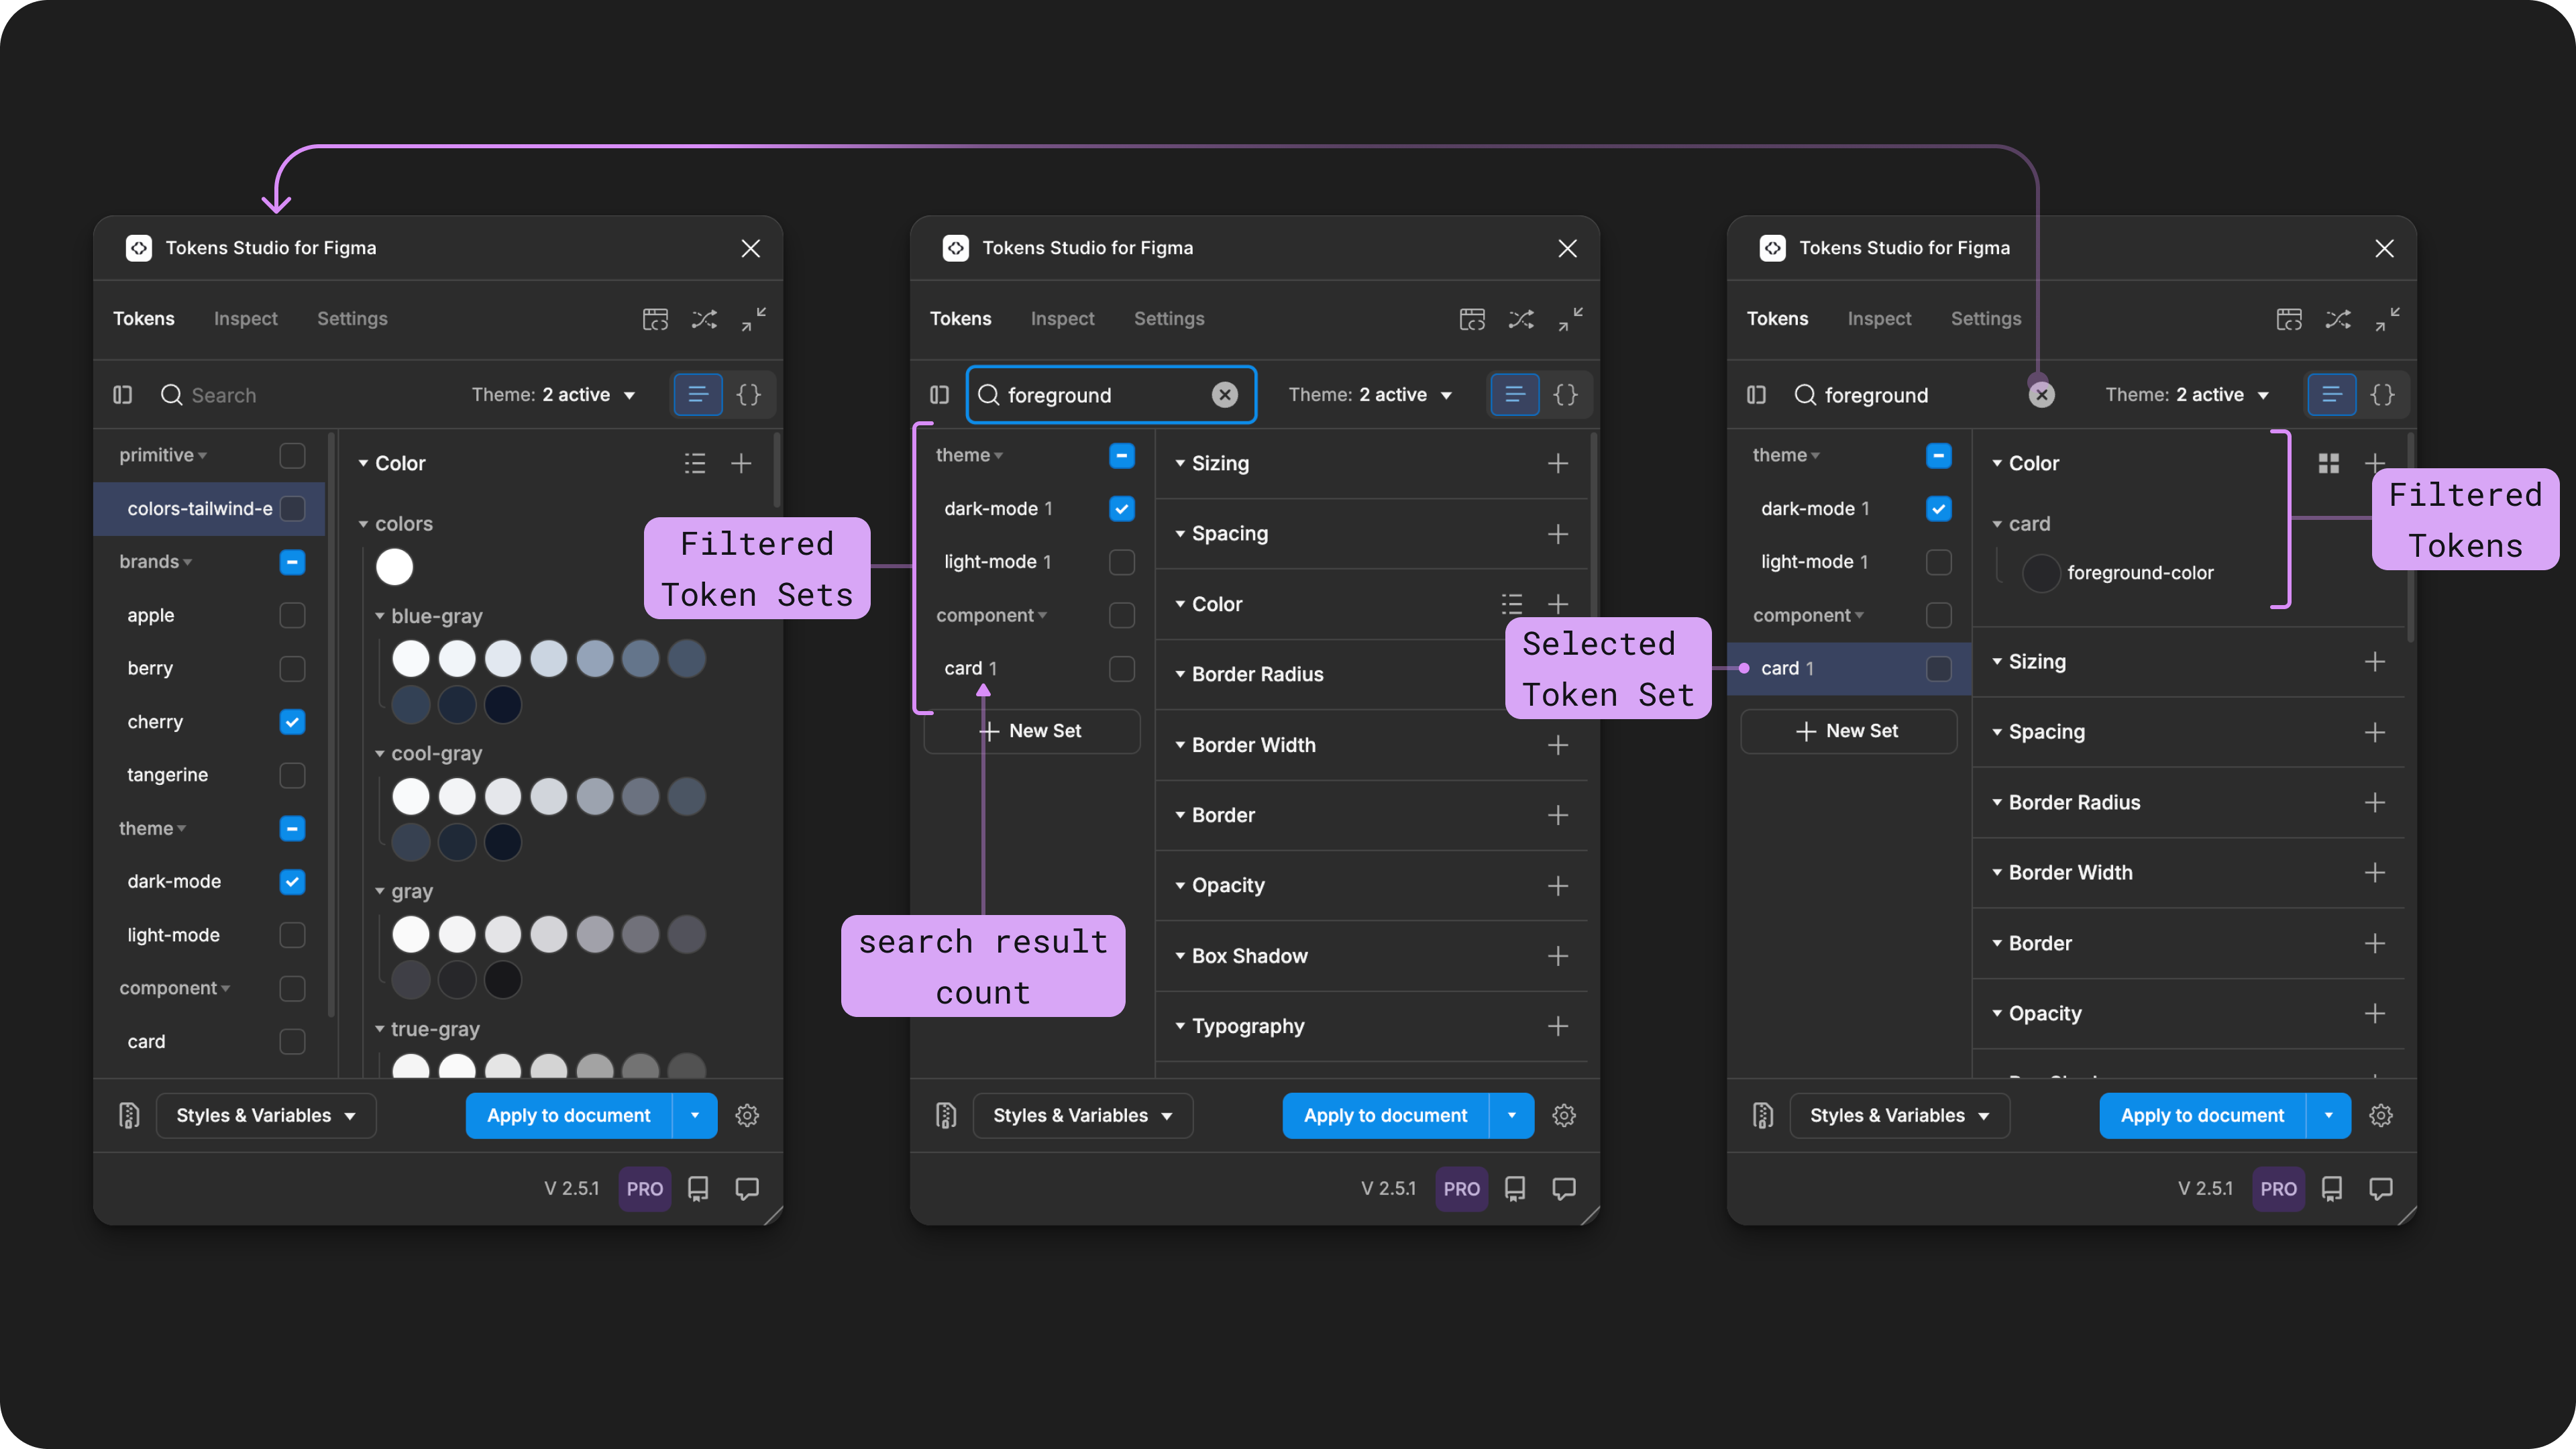
From the Tokens Page of the Plugin, a search for a "foreground" is shown in the middle image with less Token Sets than the image on the left. The image on the right shows a Token Set named component/card has been selected with a single Token displayed.

C. Themes selector

Themes (Pro) are groups of Token Sets you can define to unlock some powerful workflows.

The current number of active Themes is always visible. Select this control to open the Themes menu to manage your Themes or change which Themes are active.

If you don't have a Pro licence and you are working in a file with Themes, you can select Themes to be active but you can not edit, remove, or create Themes.

→ Read the guide on Themes and the powerful workflows that come with it.

D. Token View - JSON editor

The Tokens Studio Plugin is a no-code way for Designers to write Design Tokens to be used in code without needing to write actual code.

Each Token Set in Tokens Studio represents a JSON file under the hood. To work with your Tokens in code files, use the Token View toggle between the JSON and List view of your Design Tokens.

If you are familiar with VS Code, you'll feel right at home, as the keyboard shortcuts and actions are the same.

→ Jump to the guide on JSON view for more details.

2. Token Sets

Tokens Studio provides a suite of tools that allow designers to produce engineer-ready code so they can easily share design decisions with engineers and cross-functional team members.

Token Sets in the Plugin are the no-code home for your Design Tokens. Each Token Set represents a JSON file under the hood.

Controlling the status and order of your Token Sets allows you to quickly change how the Plugin interacts with design elements, styles and variables in Figma.

→ Read the comprehensive guide to Token Set management.


3. Design Tokens

Once you select a Token Set from the left-side menu, the Design Tokens living in that JSON file are displayed on the right. Tokens Studio supports 24 unique Token Types.

The plugin organizes Design Tokens by their Type, then Name.

  • To create a new Token, select the + icon button next to the Token Type

The Tokens Page of the Plugin is shown without any Tokens created. The left image displays the first half of the Token Types, while the right image shows the second half.

→ Jump to the guide on Token Types for more details.


4. Token Data Actions

The actions at the bottom of the Tokens Page configure how the data within the Plugin interacts with Figma.

A. Tools for Token project management

B. Styles and Variables menu

C. Apply Token aata actions

D. Advances settings to apply Token data

A. Tools for Token project management

Each Figma file is a Token project full of code files the Plugin is interacting with. If you want to download your plugin project from this file so you can move it or replicate it elsewhere, the export option enables this.

Then in a new Figma file, you can use the import option to bring in what you exported from the previous file. It's important to note that the files will be independent of each other.

Alternatively, you can sync your Tokens to a remote storage provider using the plugin if you'd rather work in the cloud or want to keep your Token projects connected across multiple Figma files.

→ Read the Sync and Token Storage Guide for more details.

B. Styles and Variables

Selecting the Styles and Variables action opens up the menu options to connect your Design Tokens with Figma's Styles and Variables.

→ Read the Styles and Variables Guide for a complete walkthrough.

C. Apply Token Data

Selecting the Apply Tokens action starts to scan your Figma file, looking for nodes connected to the Design Tokens in the Plugin based on how you've configured the options in the menu.

These options tell the plugin how much of your Figma file it should scan, and how it should apply your Token data.

→ Read the Apply Token Data guide for more details.

D. Advanced Settings to Apply Token Data

The Apply Token Data Settings contains advanced configurations for how the plugin interacts with Figma to expand the functionality of the Apply Token Data actions.

→ Read the Advanced Settings for Applying Token Data guide for more details.

Last updated

Was this helpful?