
JSONBin - Cloud Sync Provider
JSONBin sync setup guide
JSONBin provides a simple REST interface to store & retrieve your JSON data from the cloud.
You can use the Tokens Studio plugin native integration with JSONBin to sync your Design Tokens JSON files with code.
Tokens Studio supports two-way sync, meaning you can use the plugin to:
- push JSON files of Design Tokens to JSONBin
- pull the Tokens stored in JSONBin into any Figma file
This means the Design Tokens living in code are the source of truth for our design decisions, which can be shared between design and development teams.
This doc outlines how to set up JSONBin as a Sync provider in the Tokens Studio plugin.
How it works
- Set up a bin and API key in JSONBin
- Configure JSONBin as a sync provider within the Tokens Studio plugin.
- Use the plugin to sync your Design Tokens between the JSONBin and Figma design files.
JSONBin setup instructions
If you haven't already, sign up for a JSONBin account at JSONBin.
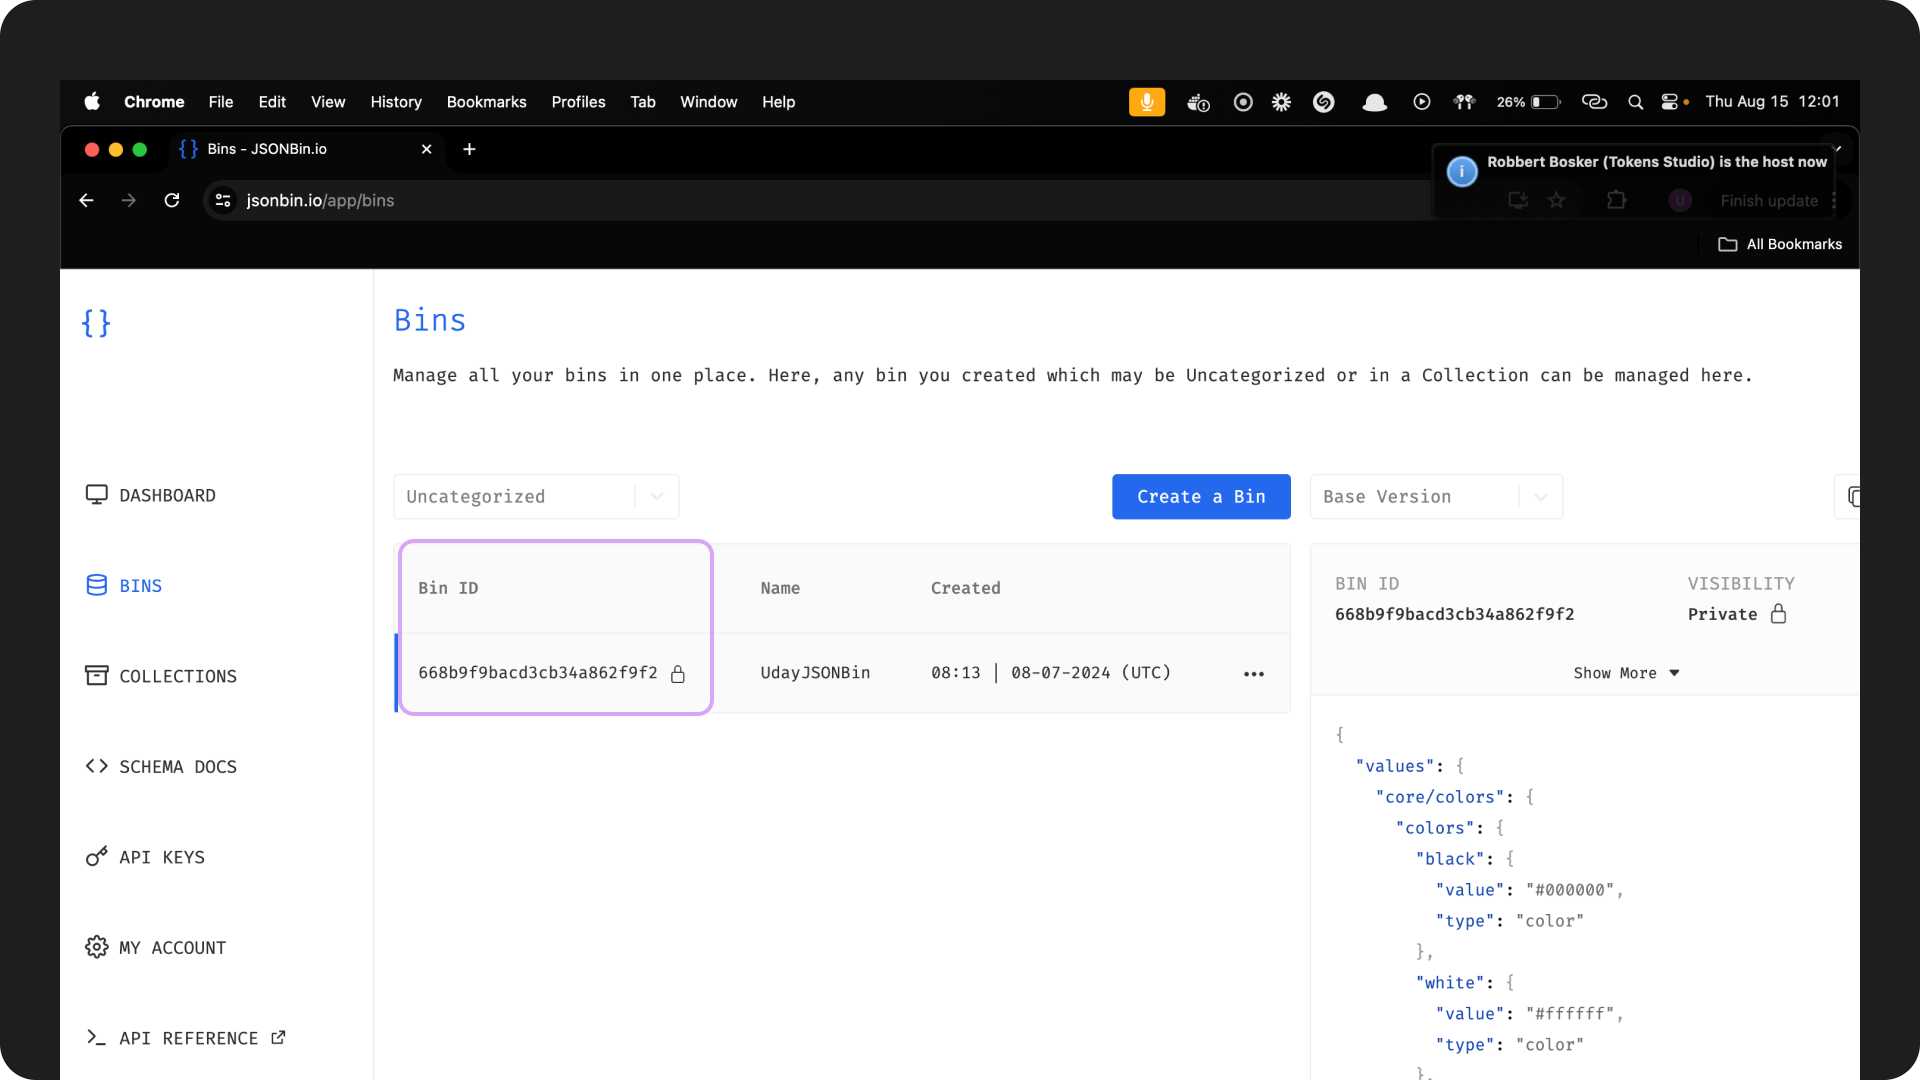
1. Create a new bin
Once you've logged in to your JSONBin account:
- Create a new bin dedicated to storing and managing your Design Tokens.
- Choose a descriptive name for your project that is specific to its purpose and is memorable.
- Follow JSONBin's prompts to create your new bin.
You are now looking at your new bin! Well done!
INFO
Record the ID of the bin somewhere safe, as it's needed for the plugin configuration.
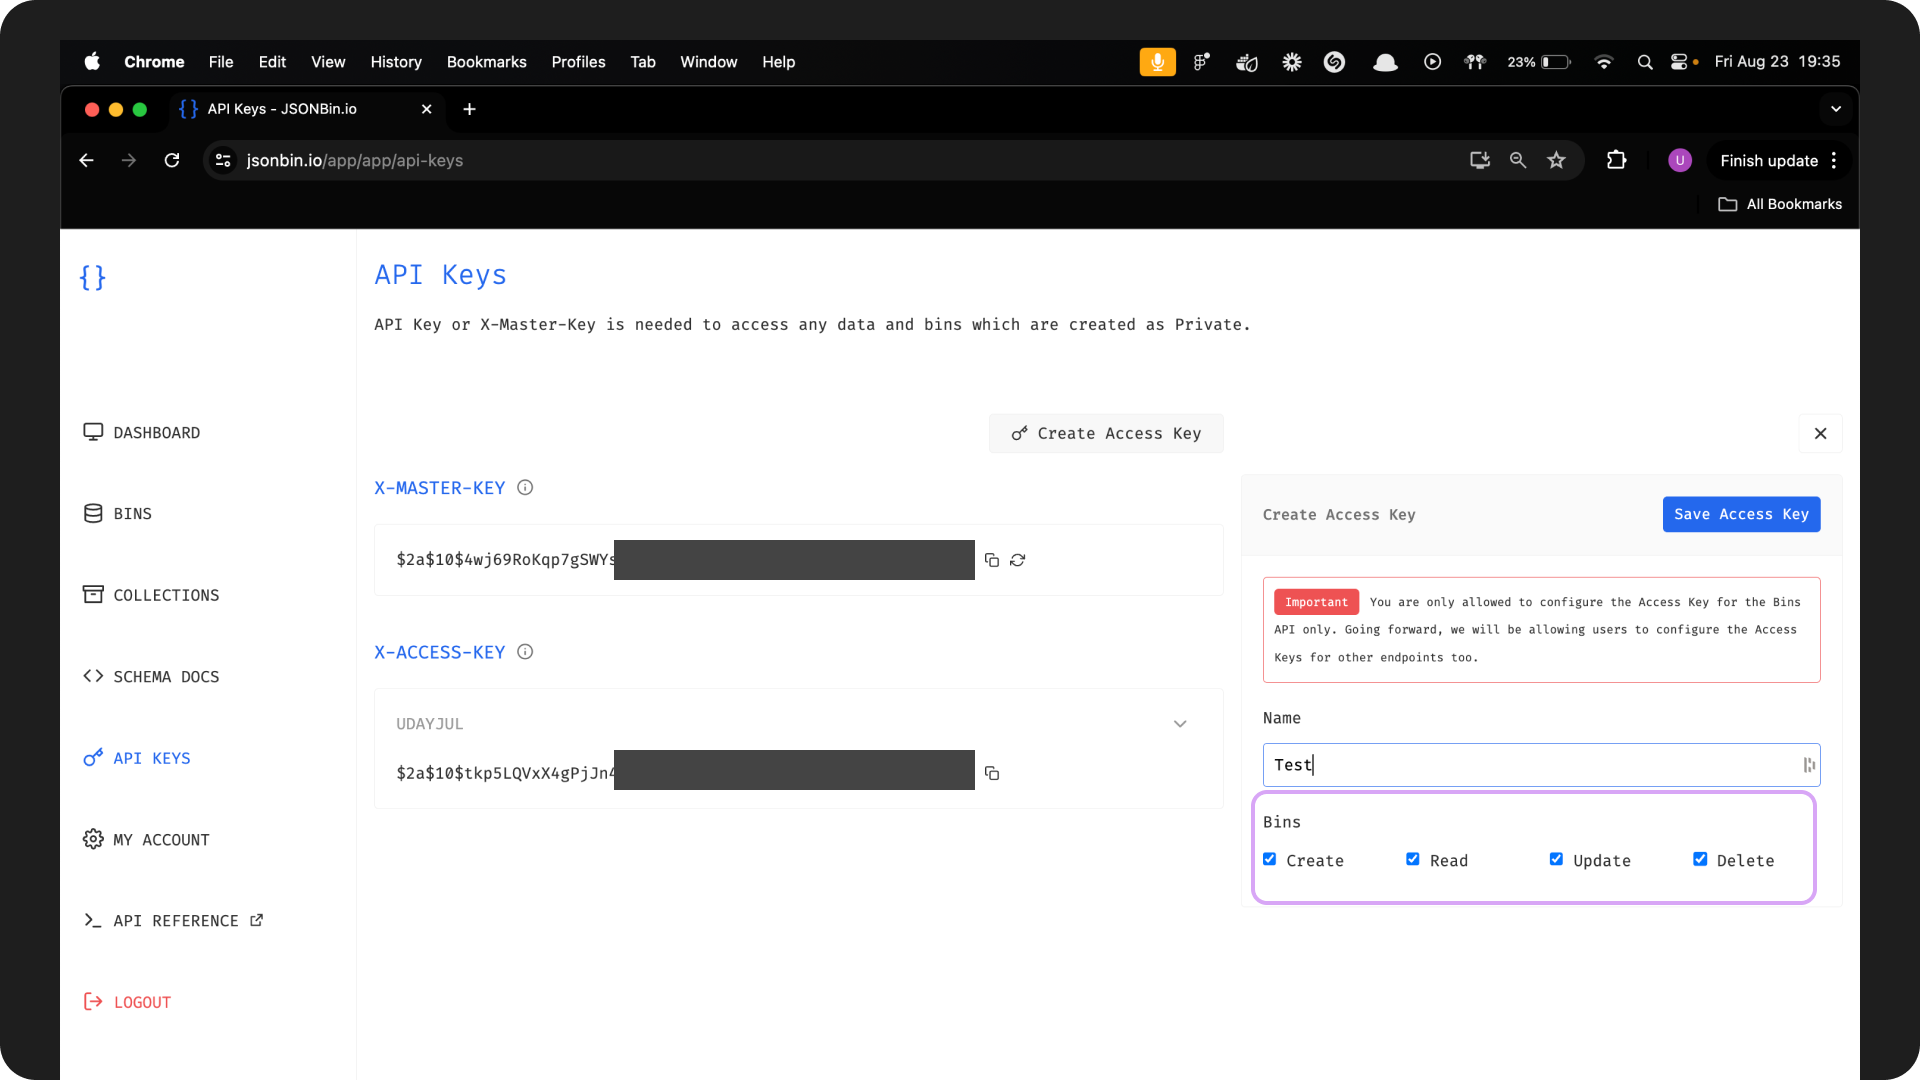
2. Generate an API key
The API key is generated from JSONBin, and acts as a passcode that allows the Tokens Studio plugin to connect to your JSONBin account.
Log into your JSONBin account:
- Navigate to your JSONBin account settings
- Locate the API Key section
- Select Create Access Key
- Add a Name of what the Token is for.
- Example:
test-Token repo sync to Tokens studio
- Example:
- Select the permissions for the Bin using the checkboxes
- Full permissions for the plugin would be
create,read,update, anddelete
- Full permissions for the plugin would be
- Add a Name of what the Token is for.
- Select Save Access Key
- Save the generated key somewhere safe as it's needed for the plugin configuration.
You're ready to configure the Tokens Studio plugin in Figma!
Configuring Tokens Studio Plugin
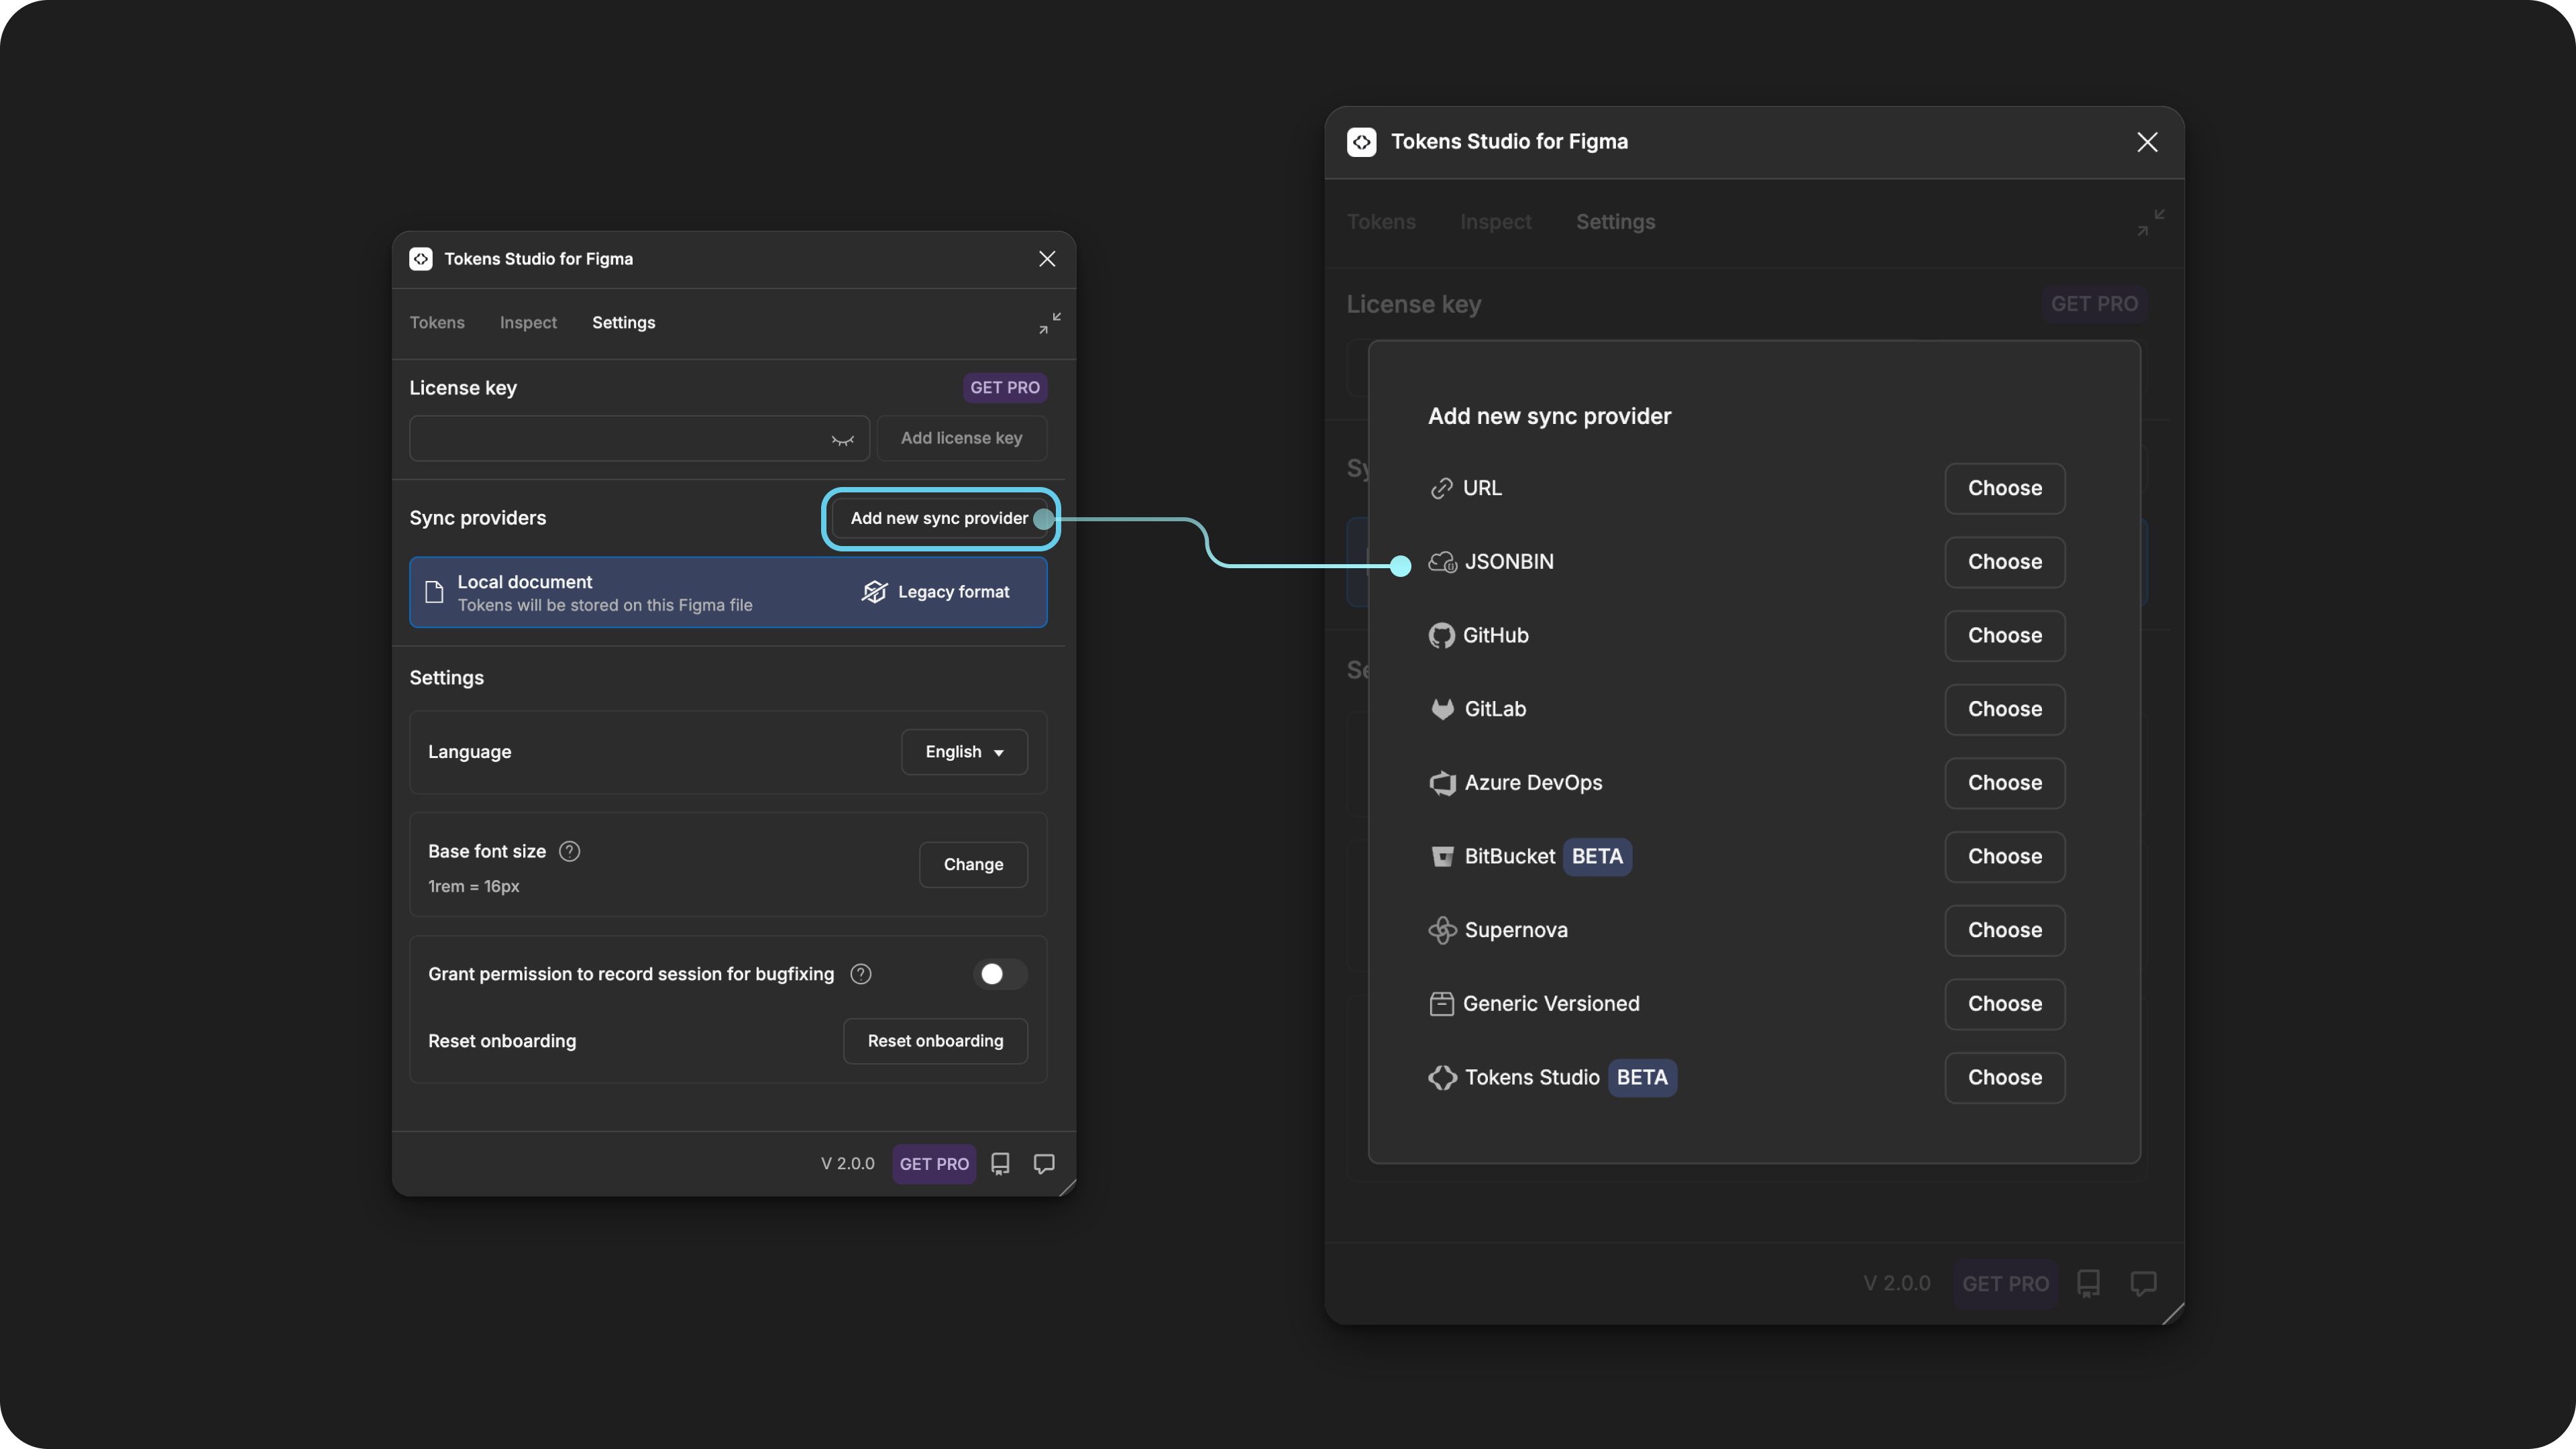
In Figma, open the Tokens Studio plugin and navigate to the Settings page using the navigation tab.
- Under the Sync providers section, select the Add new button to see a list of all Token storage providers
- Select JSONBin
3. Add credentials for JSONBin
You'll need the information saved from the steps above to complete the JSONBin sync configuration form.
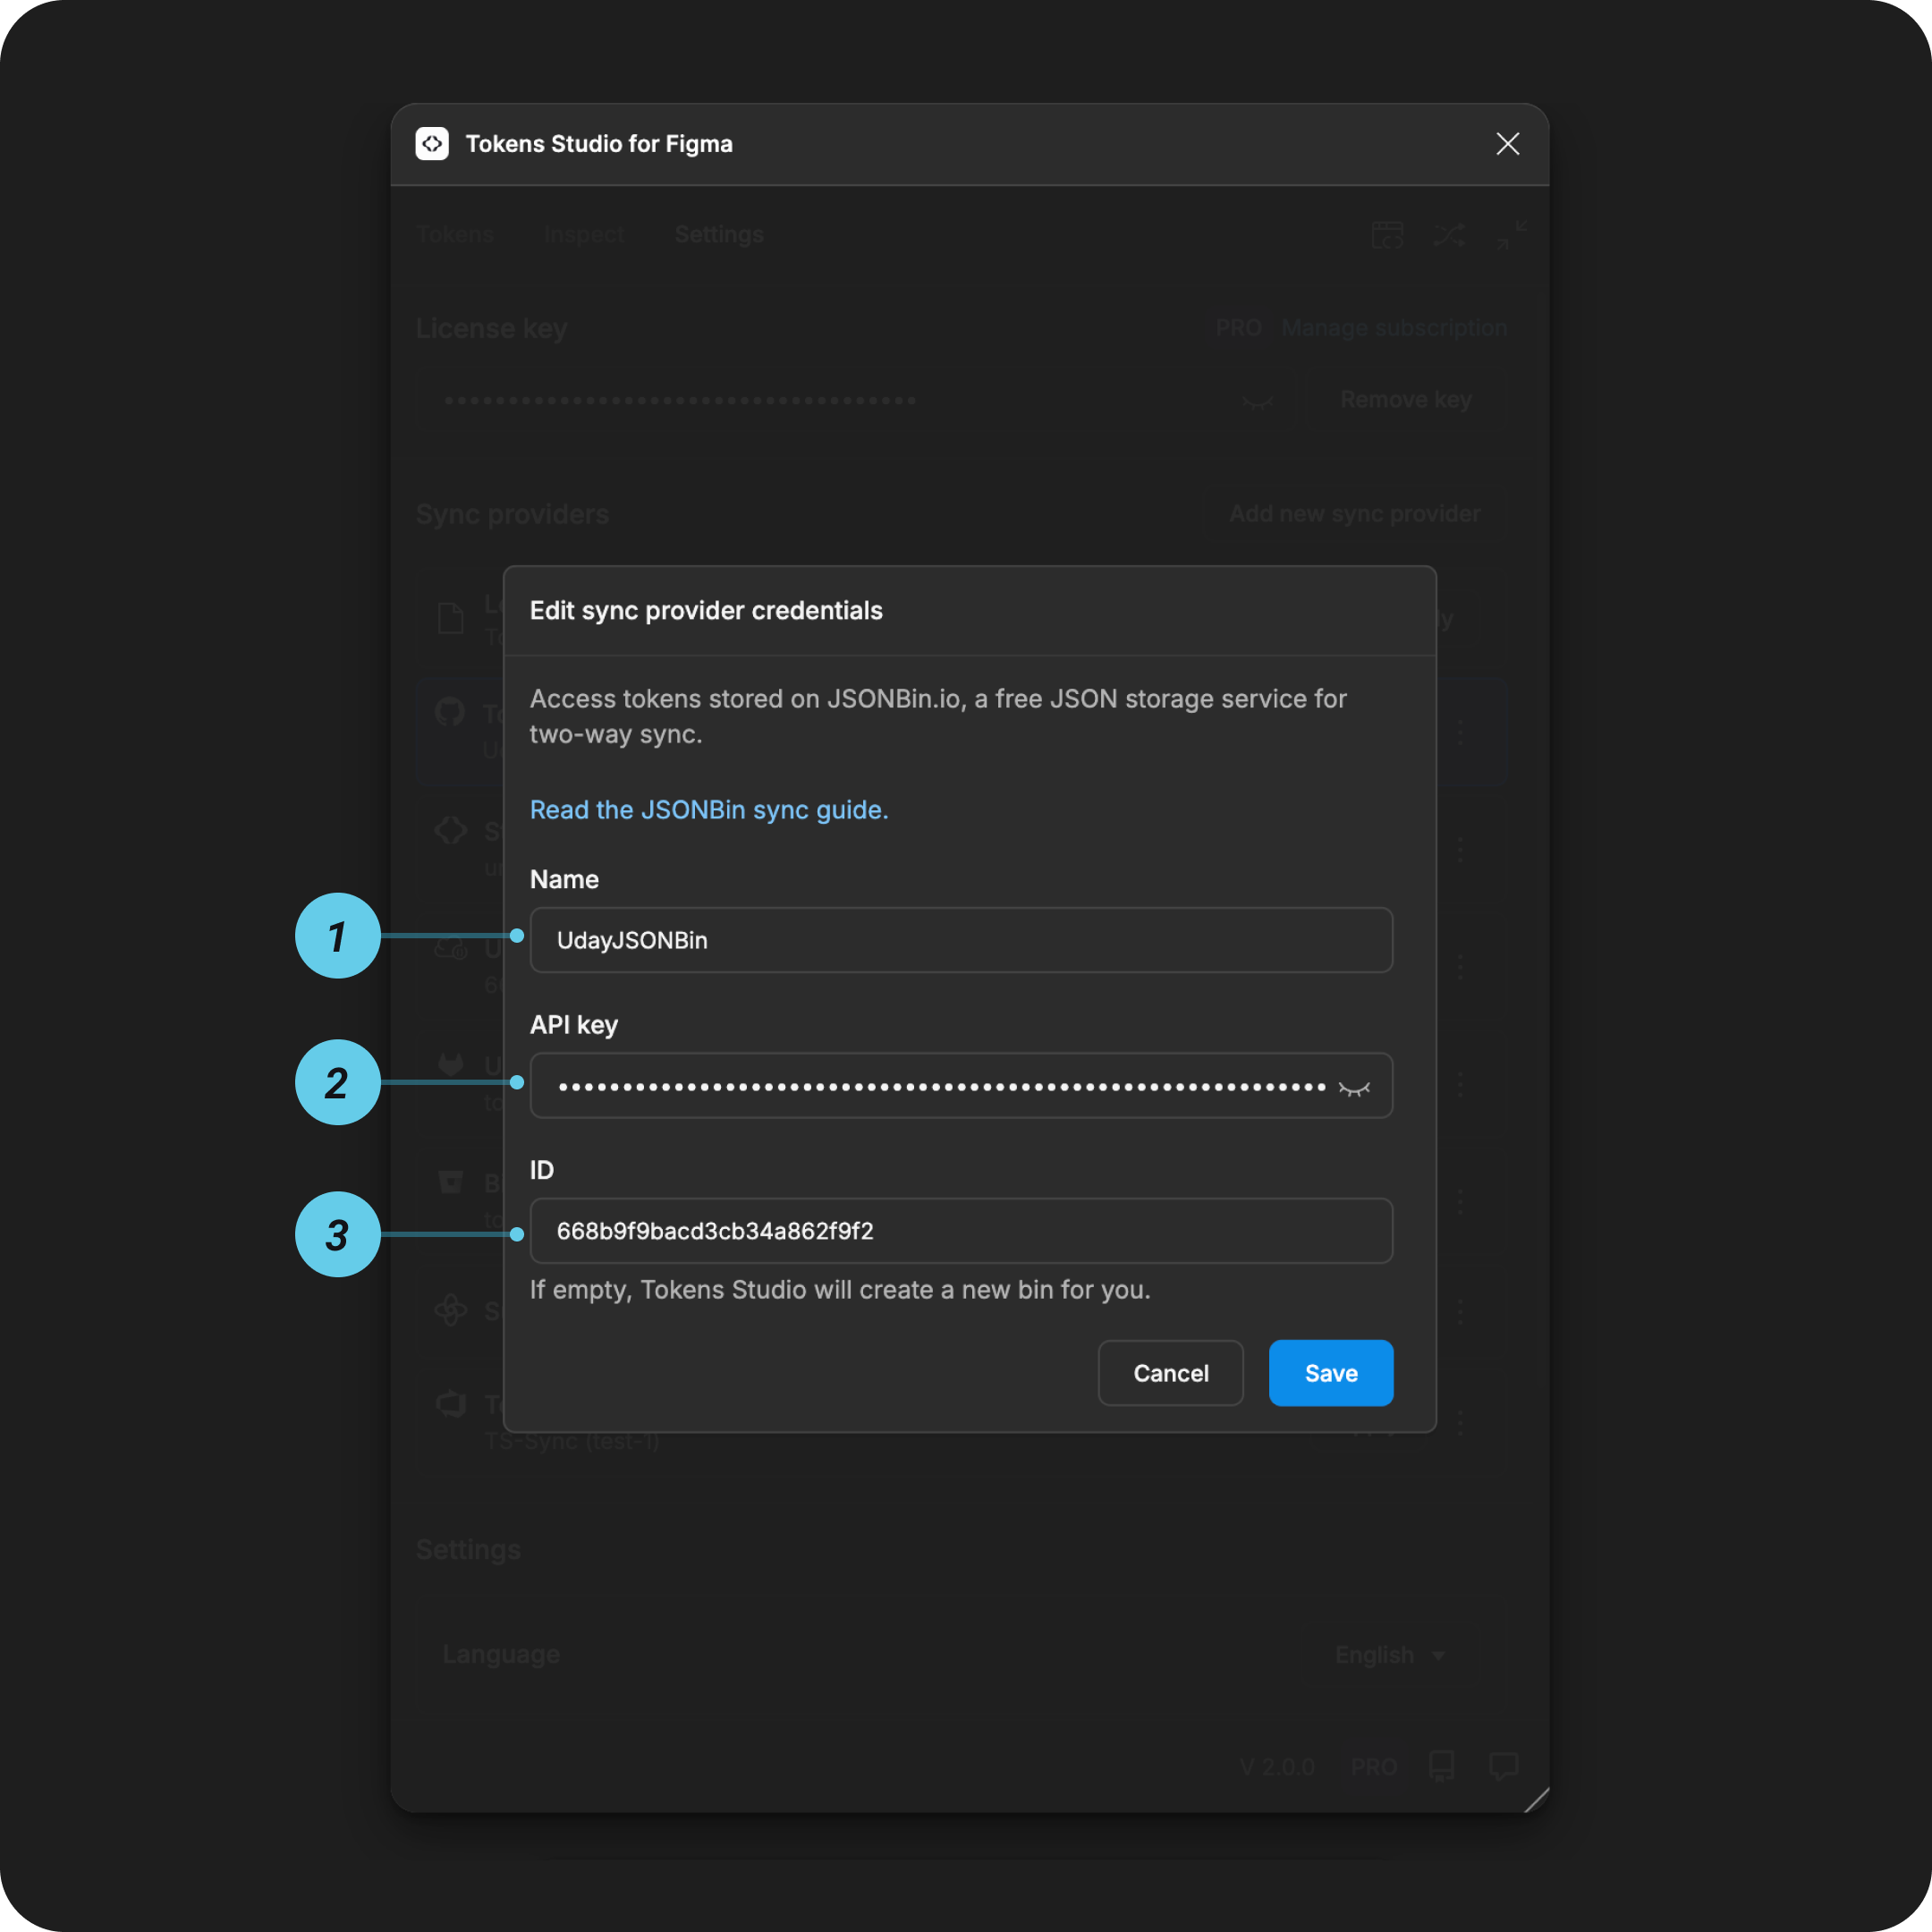
1. Name
This is a nickname that shows up in the plugin settings page later on to identify this specific sync provider configuration.
- Choose something memorable to you and your project.
- Example:
radix ui components
2. API Key
The API Key you saved from step 2 above.
3. ID (optional)
Enter the ID of the bin you created and saved from step 1 above.
- If this is empty, Tokens Studio will create a new bin for you.
Save and do the initial sync
Save to confirm your credentials, and then follow the plugin's prompts to finish setting up the JSONBin sync.
Shared source of truth
As you work in the plugin, push and pull indicators remind you to stay in sync with your JSONbin.
Once your Token JSON files are synced to JSONbin, you have a shared source of truth between Designers and Engineers!
Resources
Mentioned in this doc:
- JSONbin - https://jsonbin.io/
- SD-Transforms - Read Me
- Style Dictionary - https://styledictionary.com/
Community resources:
- None yet!
Known issues and bugs
Tokens Studio Plugin GitHub - Open issues for Sync JSONbin
- JSONBin not updating if JSON is manually added 2283
- If you paste a JSON file in the plugin and save, you then need to click 'apply to' for the JSONBin to update.
Requests, roadmap and changelog
- 🧑💻 Sync to external Token storage enhancements - Feature Request
- How might we improve the experience of working with sync providers in general?
- ↕️ Git sync enhancements - push, pull, merge, branching - Feature Request
- 🔐 Data security info request - Feature Request